[Guide] NovaBACKUP PC (Home User) Configuration Walkthrough
This walkthrough will describe how to create 2 alternating File backups, one Copy job for your photos, and a Disaster Recovery Image Backup, all on a Schedule.
Contents
Storage Device
What will your destination storage device be?
External Hard Drive(s)
There is no preparation required other than to know the drive letter in Windows. You can make a specific folder here if you wish, this guide will do the same.
Network Folder
A brief overview:
- Add a Network Device
- Adjust your default settings
- Select the Network Device as the destination.
A more comprehensive guide can be found in our [Guide] Backup to NAS with Retention Walkthrough
Create a New Backup Job
This guide will create 2 alternating File Backups, a Copy Job, and an Image Backup.
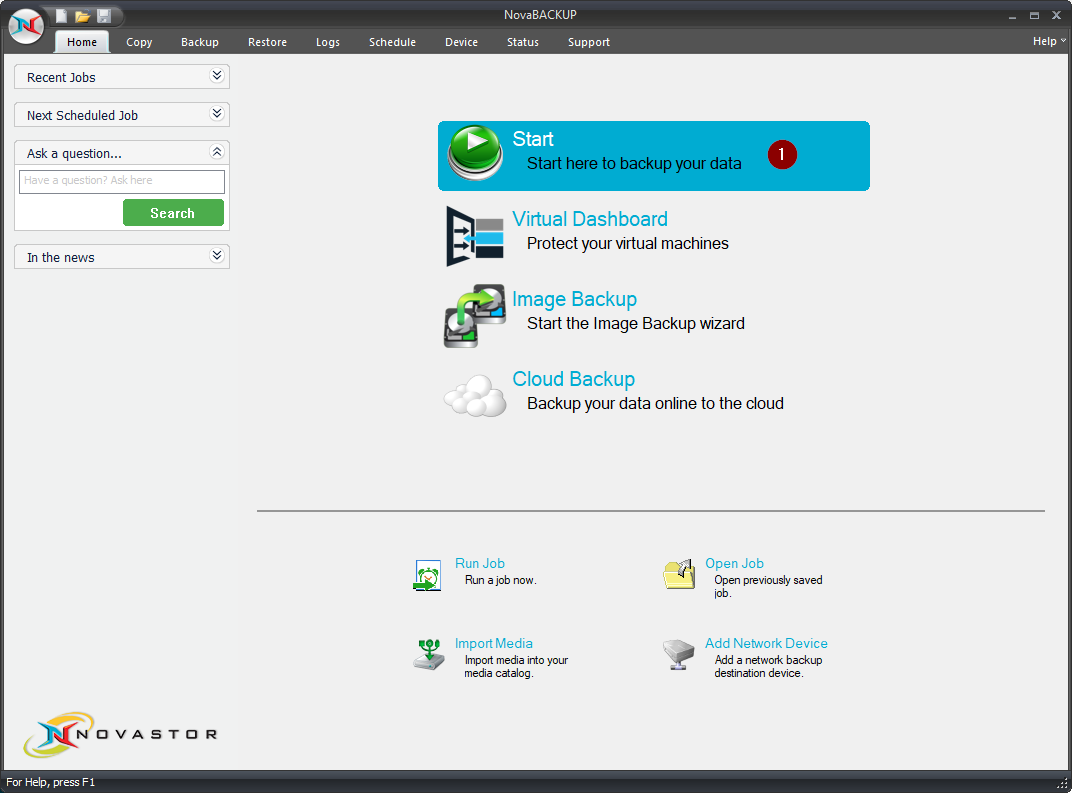
- Select Start on the Home Tab to create a new file backup job.
Select Data to Backup
Your User Directory contains most of your saved data
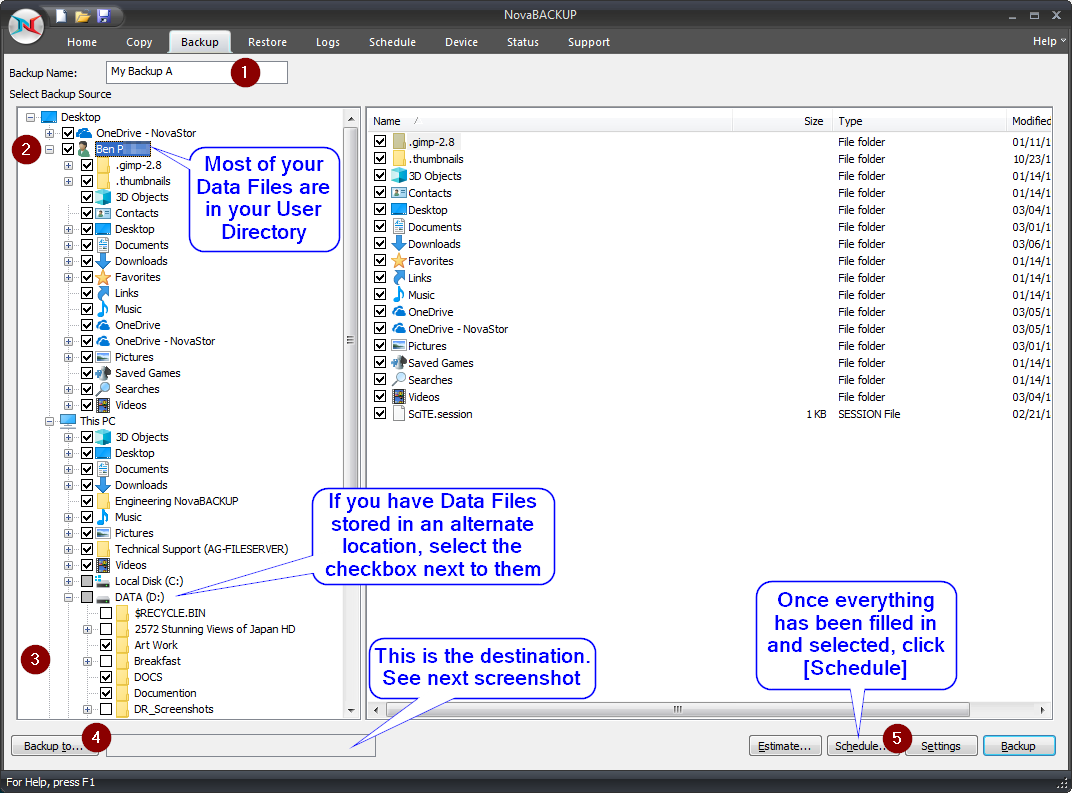
- Provide a Backup Name: My Backup A
- Select your User Directory
- Select your other Data files
- Choose your [Backup to...] Destination
- Save and Schedule the Backup Job
Exclude "Pictures" if you have many.
See the "What about Photos?" section for more information on a better way to backup your "Pictures" directory for most users using a Copy Job.
Choose the Destination and output filename using [Backup to...]
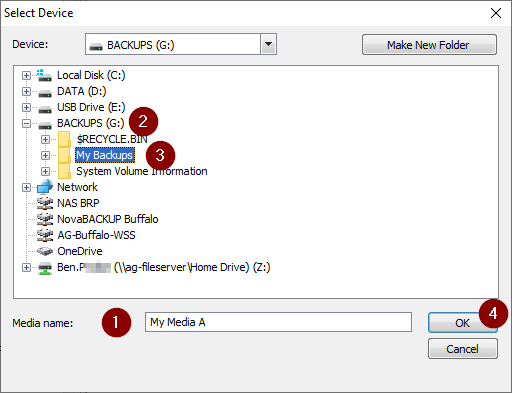
- Provide an output Media Name: My Media A
- Navigate to your storage drive
- If you created a folder to store your backups, select it
- Confirm settings, click [OK]
Schedule My Backup A
Click [Schedule...] (5) in the screenshot earlier.
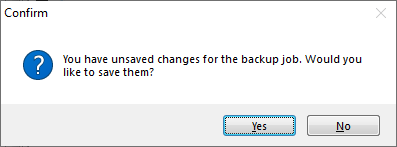
- [Yes] to save changes

- Confirm the Script File name My Backup A.nbk, choose [Save]
NOTE:
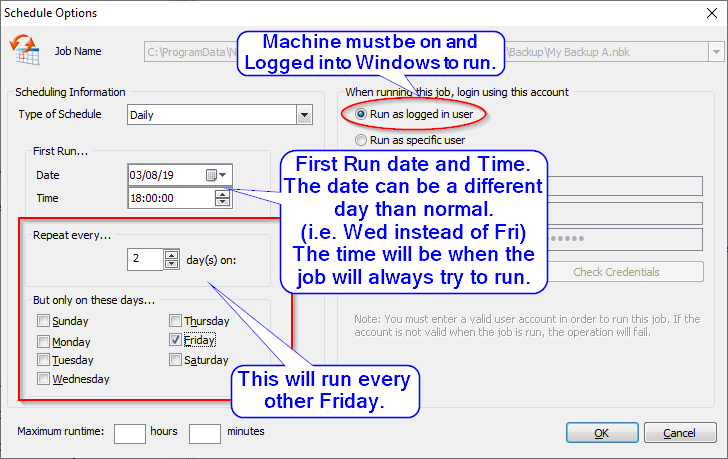
The Machine must be on, and a user "logged In", for a scheduled job to run.
Standby is not "On"
- Change the "Type of Schedule" from One Time to Daily
- Select the First Run... date and time
- This is the Time the job will run based on the schedule options
- Adjust your schedule frequency
- Change "Repeat every..." x day(s) to two (2) to run every other occurrence
- Choose the day of the week you wish the job to run on in "But only on these days..." Friday is selected here
- This means "Every other Friday"
- Provide a Windows username and password for "Run as specific user" if you logout of your machine. The machine must be on for a scheduled job to run.
Create and Schedule My Backup B
NOTE:
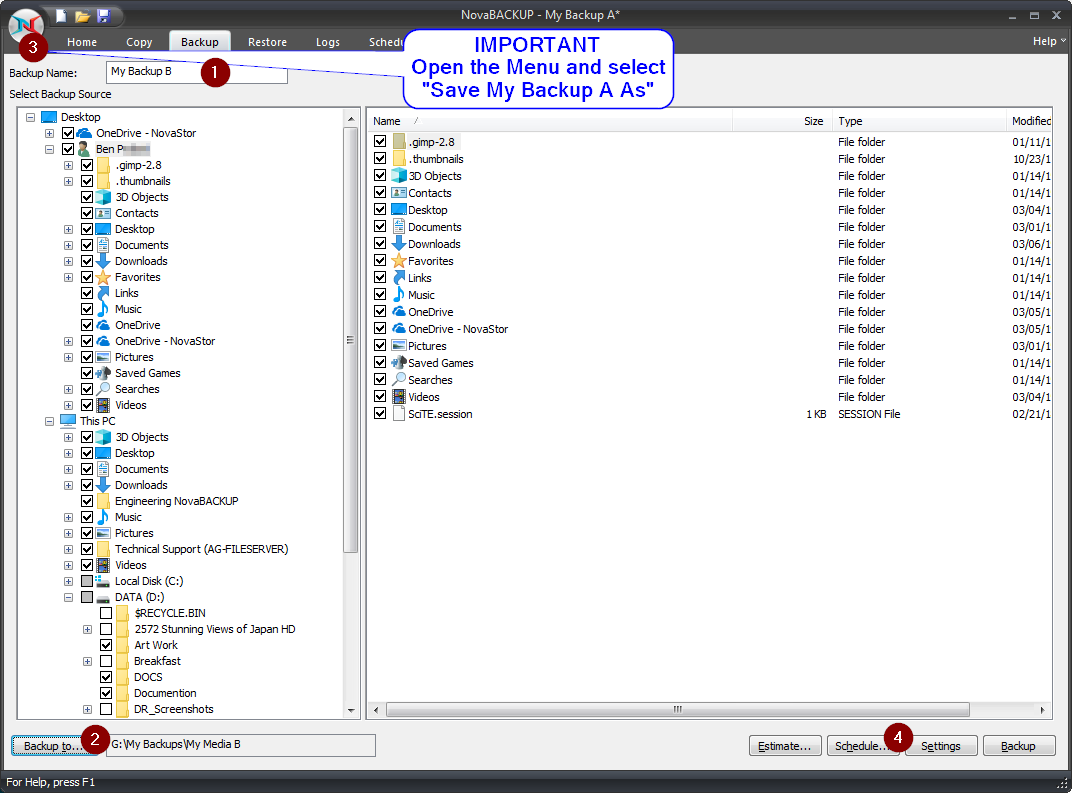
The currently loaded job script can be found in the Title Bar of the software. In this case, the previously created job "My Backup A" is open.
- Change the Backup Name: from My Backup A to My Backup B
- Change the [Backup to...] options (below)
- Save the backup job using Save My Backup A As from the menu
- [Schedule...] the new backup named My Backup B
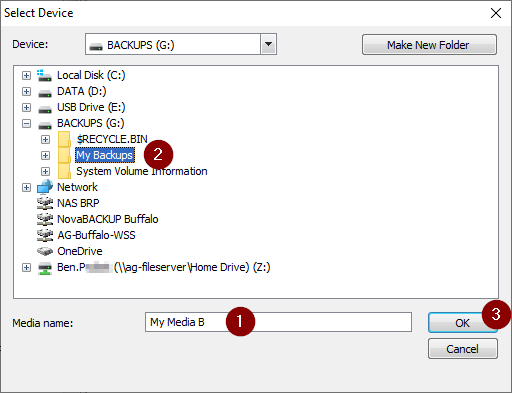
- Adjust the output Media name: to My Media B
- Re-select the destination drive and folder
NOTE: after changing the media name, it will default to "C:\" - Confirm the [Backup to...] device options
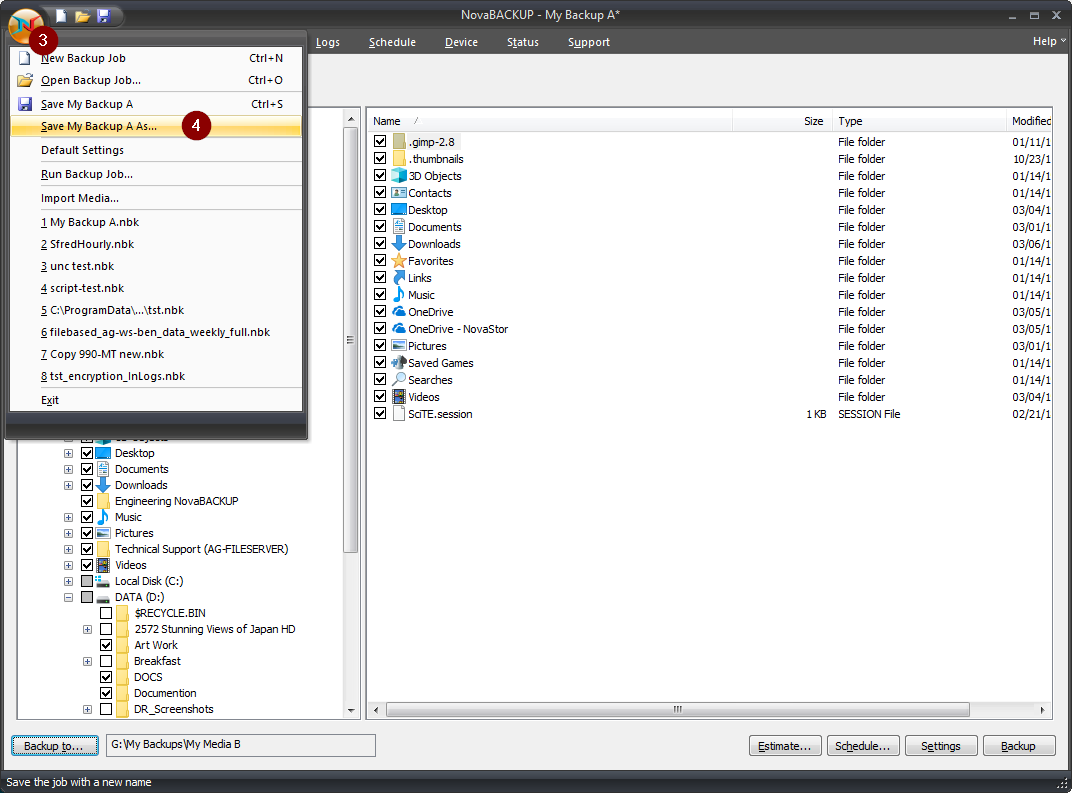
- After changing the Backup Name
- After changing the [Backup to...] location and Media name
- Open the main menu
- Choose Save My Backup A As... to save the changes made to a new job

- Confirm the File name: matches My Backup B.nbk
- Select [Save]
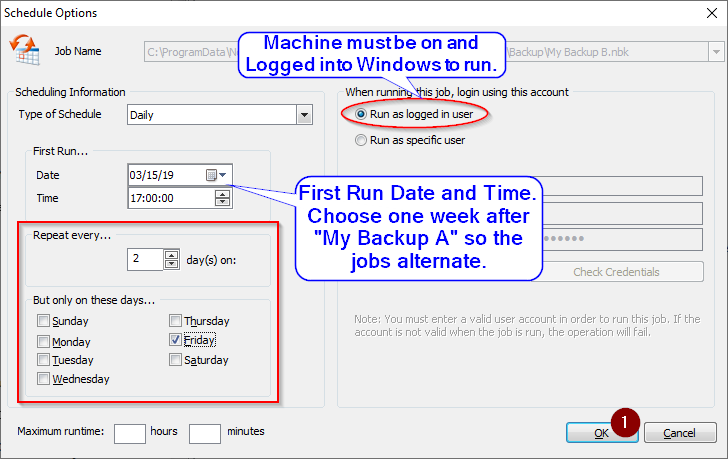
- (4) Schedule the saved My Backup B job, confirm the saved name matches My Backup B.nbk in the Job Name: area
- Change the Type of Schedule to Daily
- Select a First Run... Date to the next week from when My Backup A was scheduled
- Choose a Time for the job to run at every other week
- Repeat every...2 days onFriday
- Provide Run as specific user credentials as needed (same as before)
- Confirm the Schedule by selecting [OK]
What about Photos?
What's the difference between Backup and Copy?
A Backup will store all of your selected files into a single "container" file, with a .NBD file extension. You will have to access these files using NovaBACKUP
A Copy will maintain the folder structure of the selected files, keeping them visible to other programs and Windows. Also, if configured correctly, this job can update files instead of copying all of them every time, substantially decreasing the time it takes.
If you have a large number of photos, use Copy.
Make sure to remove these from your File Backups you just created if you wish to use this method.
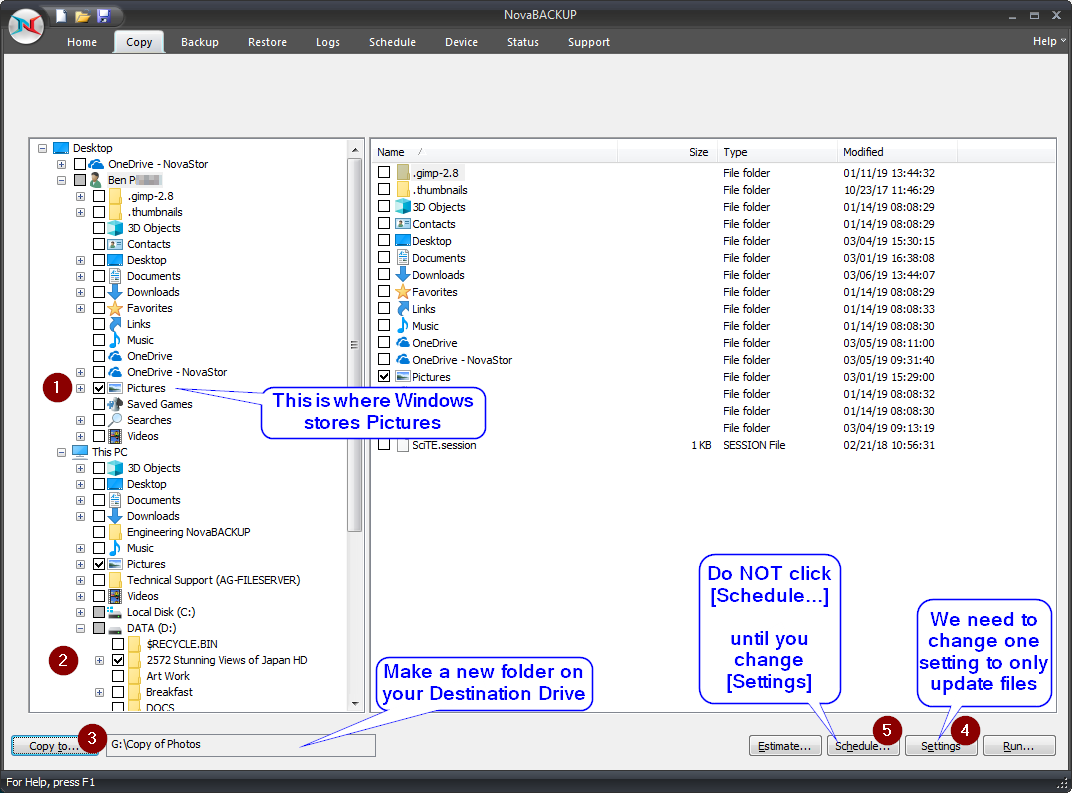
- Select your User Pictures directory
- Select other locations your Pictures are saved in
- Choose [Copy to...] destination. Make a folder to keep it separate.
- Adjust [Settings]
- Save and [Schedule...]
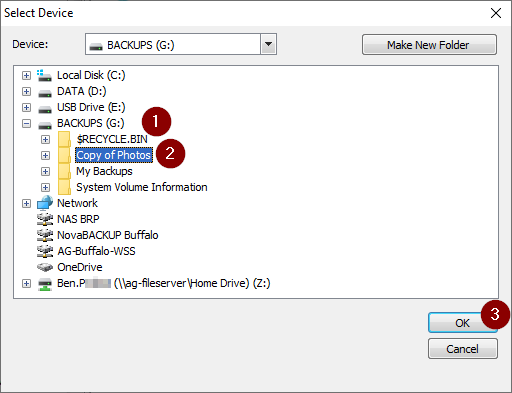
- Select the Destination Drive
- [Make New Folder] and/or select the Destination Folder
- Choose [OK]
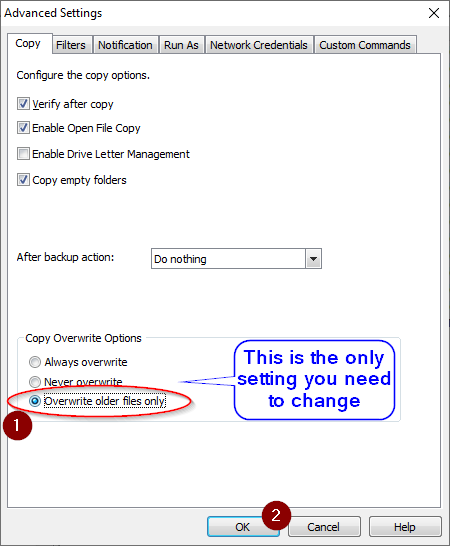
Schedule the Copy Job
(5) Select [Schedule...]
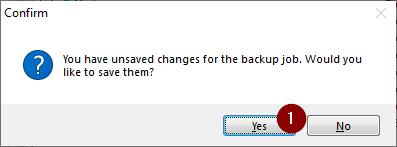
- Confirm [Yes] to Save the Copy Job Script

- Enter a File name for the Copy Job and Script (similar to Backup Name)
- [Save] the Copy Job Script
If you are not prompted to Schedule the job at this point, select [Schedule] again.
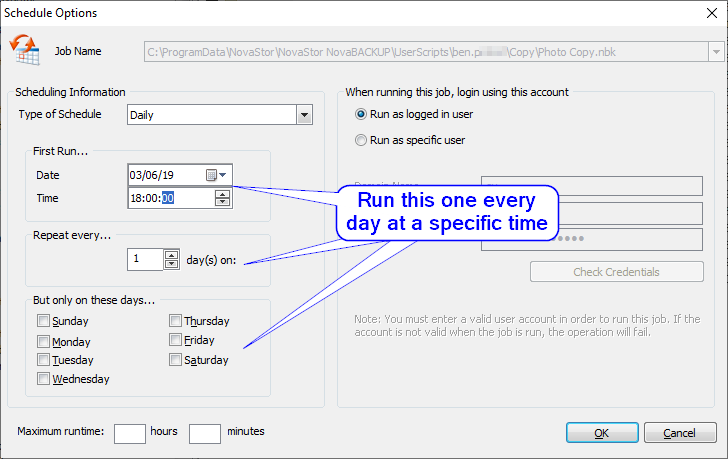
- Type of Schedule = Daily
- First Run...Date & Time, Time is normally more important than Date here.
- This job will run at the specified time each day.
- If you want to restrict this job to certain days, you can choose the days to run on.
- Confirm the Schedule Options with [OK]
Disaster Recovery Image Backup
What is an Image Backup?
An Image Backup is a block-level copy of all data on your drive. This process can be used to create a backup of your Windows Environment, as it does not look at individual files. This is also known as a Disaster Recovery Backup.
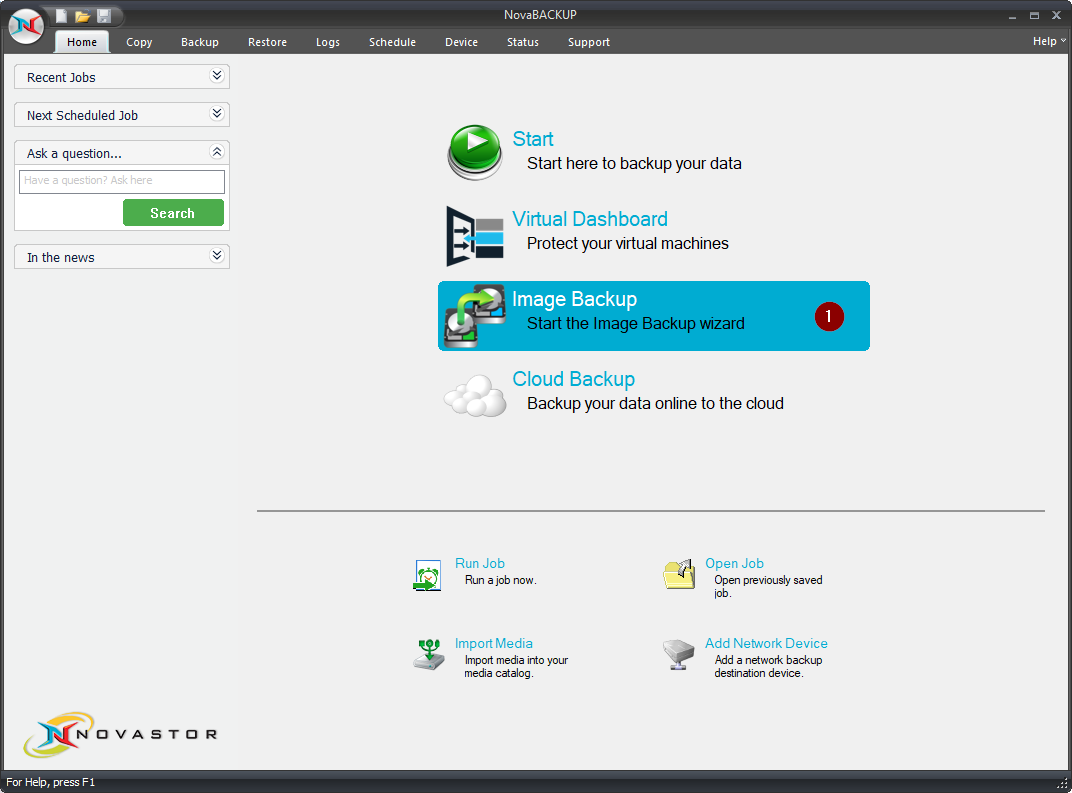
- Open the Home Tab
- Select Image Backup to Start the Image Backup Wizard
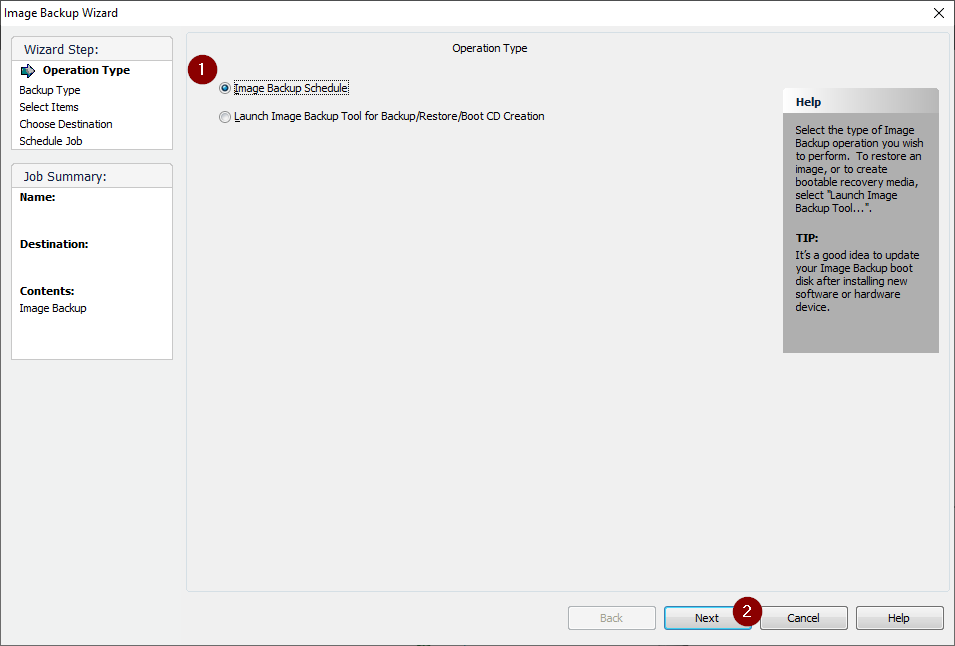
- Select Image Backup Schedule
- Click [Next]
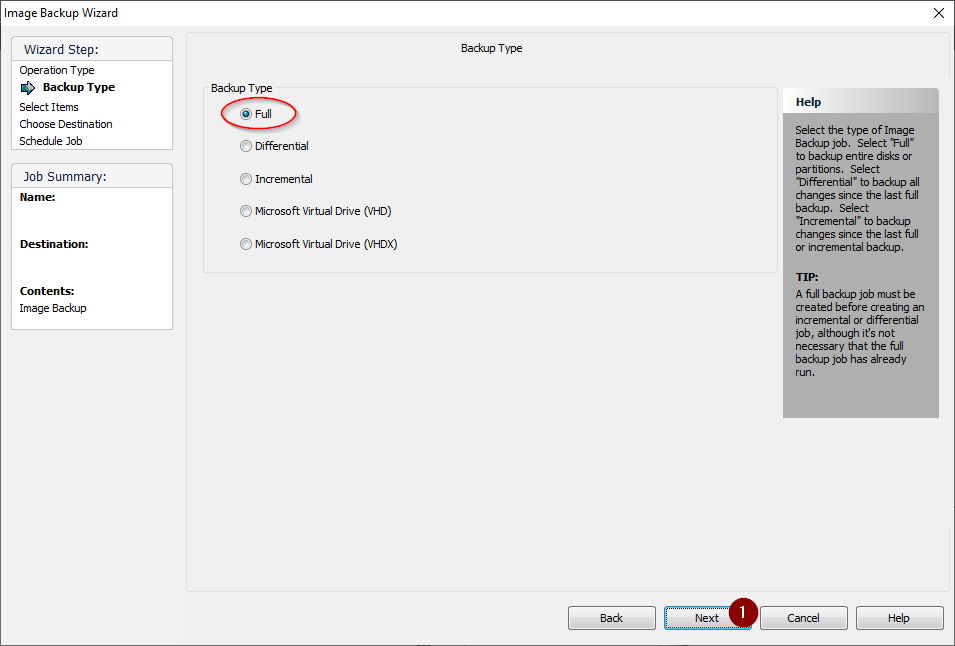
- Confirm the Backup Type is "Full", click [Next]
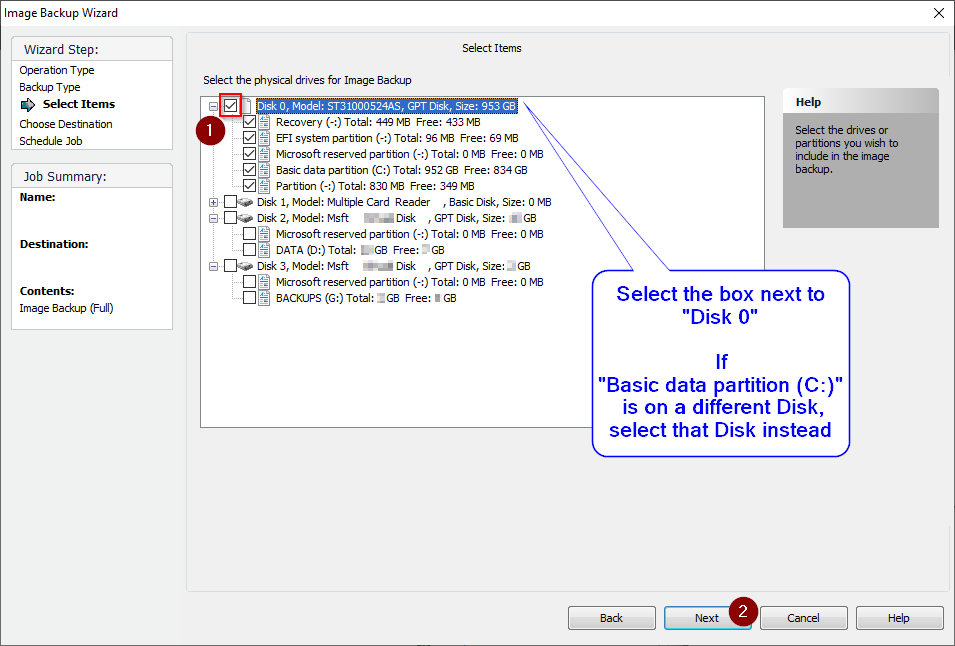
- Select Disk 0 (or whichever disk contains your "C:" partition)
- Click [Next]
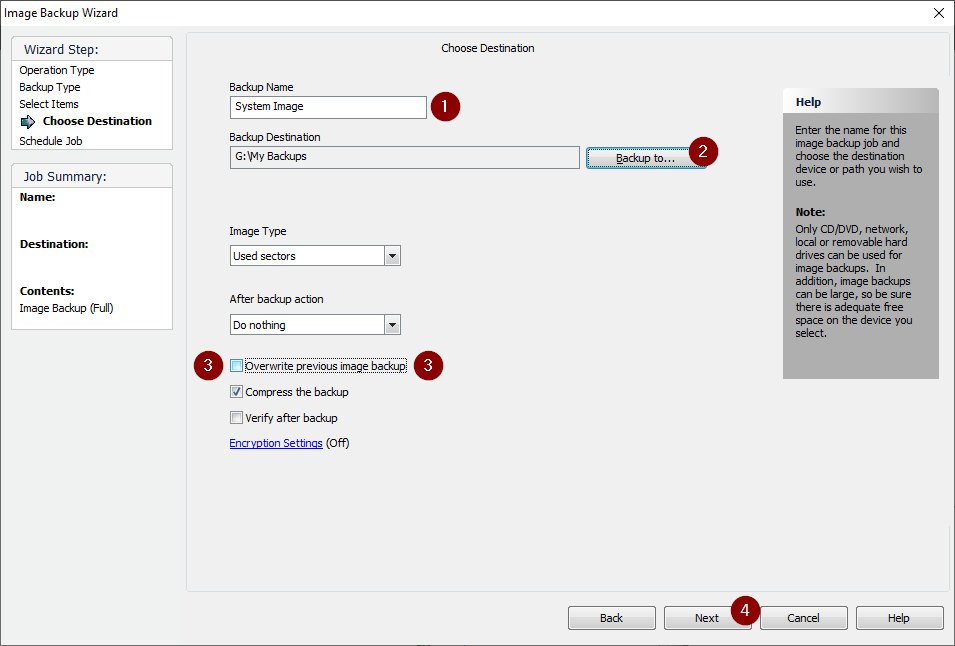
- Specify a Backup Name "System Image"
- Click [Backup to...]
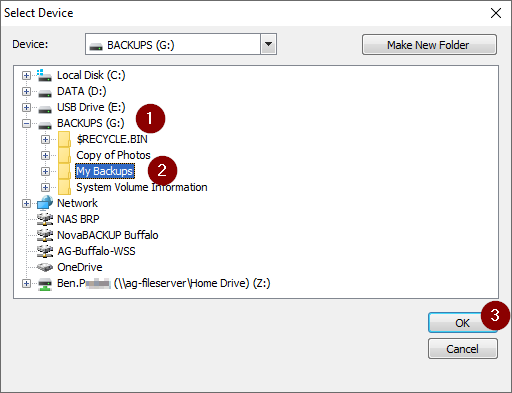
- Select the destination storage device
- Click [OK]
- Uncheck the "Overwrite previous image backup" option. That would only be useful if you wanted to always overwrite your existing image backup on the backup destination each time it runs (only useful for if you are very space limited and can only fit one image at the storage destination or if you swap removable media in and out and can only support overwriting the existing image that is stored there each time the job runs).
- Click [Next]
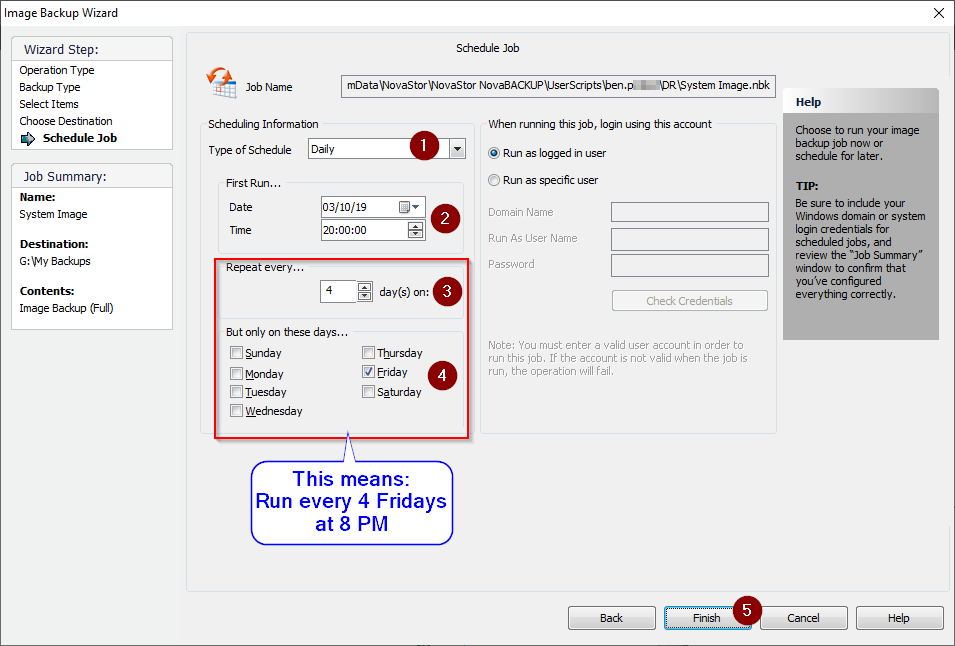
- Select Type of Schedule "Daily"
- Adjust the First Run Date & Time you wish the backup to run
- Repeat every 4 occurrences of the Day (chosen next)
- Select the day of the week you wish the Image Backup to run (Fri)
- Click [Finish] to schedule the job
- Confirm the Backup Type is "Full", click [Next]
